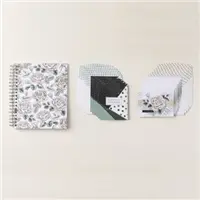
Last week I was looking through all of the online only items on my Stampin' Up! website and I stumbled upon the Card Organizer Kit. I could not believe it was only $25. I remember creating my own organizer years ago. It took a ton of cardstock and was a very labor intensive and expensive project to use for a workshop. I immediately knew what a great deal this kit was for the book alone. Then I noticed that it also included the supplies to make 12 cards. Sold!
I fully expected to want to level up the cards that were included in the kit, but the floral card is beautiful and I love that the kit included sequins. The simple look of the second card makes it work well for the males on my list. I think they would look great if you add some ephemera, balloons or cupcakes, but I would absolutely send them out the way they are.
Here's a quick video I created to show how fun this kit is.
My buddy Gail and I were well known at Close To My Heart for a while for our goofy shenanigans that we called "The Dawn and Gail Show." We did quick little one-minute videos with updates from Conventions and our road trip adventures. We also ended up interviewing many VIPs, including:
Monica Wihongi - President of Close To My Heart
Pierre Gelinas and Brian Holman (VPs - I think. I don't remember titles. haha)
Stacy Julian
We ended up with a fun fan club and self-appointed "security" when people started sneaking in when we were recording.
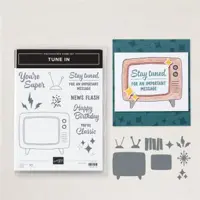
Gail and I have begun entertaining our team with our videos again so when I saw the Tune In stamp set in the catalog, I knew I had to buy it. The TV is very similar to the logo I created for the Dawn and Gail show swag.
Good News is that the Tune In stamp and die bundle is one of the many bundles that are on sale for an additional 10% off June 5 - 30, 2024. Such a deal!! I've linked the products at the bottom of this post.
Tips and Ideas:
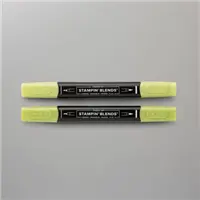
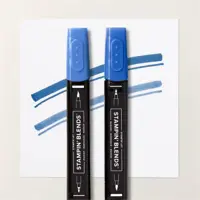
Add dimension to your die cuts by using your Stampin' Blends or alcohol marker to fill in some of the areas on the die cuts.
I used up some of my stash of Close To My Heart two-toned cardstock. I love how you can tear the paper to expose the white core.
Try adding black stitch lines around your card or on the designer series paper.
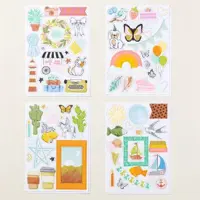
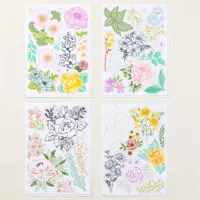
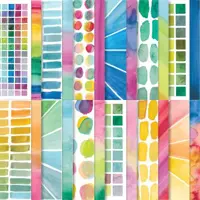
Today, I am thrilled to share my latest crafting adventure using the stunning Frames & Flowers Specialty Designer Series Paper from Stampin' Up! This beautiful pack includes 3 double-sided 12x12 papers and 3 sheets of single-sided die-cut designs, providing endless creative possibilities. With the addition of some Lost Lagoon and Petal Pink cardstock from the Subtles 8 1/2 x 11 cardstock pack, I crafted four unique cards and a charming gift bag. Let's dive into the details!
Birthday Bag
Sponge edge of frame and white matte with Lost Lagoon ink
Stamp image from Simply Said stamp set to center of white matte
Attach white matte to bag
Attach frame to matte with foam tape
Add additional die-cuts and embellishments to frame
Shabby Chic Distressed Edges
I used my scissors to distress the edges of the Lost Lagoon cardstock on each of these samples. The distressing adds to the homemade appeal and adds more texture to the cards. I also layered a couple of die-cuts from the Unbounded Love dies on the thanks card. I love how many dies come in the set and all the different ways you can layer them.
Sponged Edges - Lost Lagoon Ink
I sponged the edges of several layers with Lost Lagoon ink. Sponging the edges can increase the contrast between the layers, add depth and add a bit of a visual frame to the layers.
Final Thoughts
Creating with the Frames & Flowers Specialty Designer Series Paper was an absolute delight. The combination of Lost Lagoon and Petal Pink cardstock added a soft, cohesive touch to all my projects. I still have a large assortment of die-cuts and some Designer Series Paper left, which means more crafting fun awaits!
If you're looking for inspiration, I highly recommend experimenting with distressing techniques and sponging ink to add depth and character to your projects. The Frames & Flowers pack provides a perfect starting point for creating elegant and charming designs.
When you spend $99 for the Starter Kit, you get to choose $125 of products AND Stampin’ Up! is adding the following products to each Starter Kit:
2024-2026 In Color Classic Stampin’ Pad Bundle
2024-2026 In Color 6″ x 6″ Designer Series Paper
2024-2026 In Color 8-1/2″ x 11″ Cardstock
2024-2026 In Color Stampin’ Write Markers
That’s an added $82 value!
Why Join?
Here are some of the reasons people join:
Become a part of the Stampin' Up! and Paper Train community!
20% - 25% off all Stampin' Up! products
Exclusive early access to new products
Earn up to 38% commission on all personal purchases and customer sales
Extra income based on sales and recruiting
You decide your income goals!
Work it as a business to pay bills, save for a trip or support your hobby. You decide and you will never be pressured by me!
I have scaled up my business in times where my family needed more money and scaled back when they needed more of my time. I'm now at a point where I can maintain a nice even balance and enjoy the fun of sharing ideas with my customers and mentoring my team.
Paper Train Group Community
Be a part of our private Facebook Group.
Ask questions, share ideas, make friends and more
In person meetings, events and retreats in San Diego County
Online Zoom meetings
Training videos and posts
Training and Resources
Stampin' University
Training on all aspects of getting started
Stampin' Up! Demonstrator Training FB Group
Live training each week
Large archive of past training
Ideas from demonstrators around the world
Stampin' Up! sponsored events; virtual and in person
Starter Kit Details:
For just $99, new demonstrators get:
Up to $125 worth of current Stampin'Up! products of their choice.
A business supply pack (brochures, catalogs, order forms, etc.)
A free Paper Pumpkin Kit
Joining Process
Step 1 - Click on the Join Today button on my website.
Step 2 - Choose up to $125 worth of products to create your own custom Starter Kit.
As soon as I saw this stamp set in the catalog I immediately dubbed it the "Stamptildawn" set. What a perfect set for me. I have a feeling I am going to get a lot of mileage out of this set. I'm envisioning some fun swag for my customers.
What do you do when you have limited supplies?
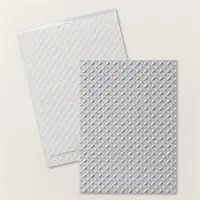
I don't really have any patterned paper that matched the vision I had in my head so I pulled out some cardstock, the Metal Plate 3D embossing folder and a stamp pad. For those of you who have CTMH products in your craft room, I used the Capri cardstock and ink. You could get a similar look by using Stampin' Up! Azure Afternoon.
You can get three completely different looks! You can use the embossed cardstock without ink or you can drag your coordinating ink pad over the embossed/top side or the debossed/bottom side.
Don't forget the envelope!
Stamping the envelope makes your mail look even more cheerful when it arrives in the recipient's mailbox!
YouTube Tutorial
Here's a quick video demonstrating how to add ink to your embossed cardstock.
I am so excited about the Stampin' Up! subscription box called Paper Pumpkin! I got one in my kit and my aunt shared a couple of hers with me. These kits are perfect for all levels of crafters!
I have subscribed and I will share additional tips and ideas on how to create with the kit.
Want quick and easy? Follow the tutorials for the kit exactly as it comes.
Want to step it up or create coordinating gift bags, gift card holders, fancy fold cards or whatever else I dream up each month? I will share my level up ideas in my VIP Facebook Group and via my customer newsletter.
What do you get?
Each kit includes a photopolymer stamp set, Classic Stampin' Spot, and step by step instructions to complete exclusive paper craft projects, including cards, tags, and gift packaging for only $25 per month (includes shipping!)
Help! What color do I suggest?? I have already been struggling to figure out what to say in my videos when I am using CTMH pads. If you don't have them, what color should I suggest? These things keep me up at night I tell ya!
Well Stampin' Up! created a great chart to help us match Close To My Heart colors to the Stampin'Up! colors and I created labels using the 1/2 x 1 3/4 inch labels (Avery 8167 template) to put on my pads!
I know this will help my fellow CTMH peeps so you can prioritize your purchases. Let's face it, we all have stamp sets, paper packs and tools on our wish lists. If we have a stamp pad that will work to get us by, we can buy something else on our list, right?
Please leave me a quick comment to let me know if you find this helpful.