Friday, December 31, 2010

January 2010 - Stamp of the Month Blog Hop

Happy New Year!!!  And what a year it's going to be.  So many fun paper packs and stamp sets coming our way!!!

Starting with.... the January Stamp of the Month
Find Your Style (D1452 - Set of 9)

 (If you came here from Traci's Blog, you're on the right path.)


 I love, love, love this stamp set! It is so fun to stamp! You can stamp it in a solid color and it looks beautiful or you can do some stamp rolling, like I did in the sample below. Ink the stamp in the lighter color first (Sweet Leaf) and then roll the edges in a darker color (Juniper).


Now head on over to Judy's Blog to see what she came up with.

Tuesday, November 30, 2010

December Stamp of the Month Blog Hop

Welcome to the SOTM blog hop.  If you arrived from Melinda's blog, you're on the right path!

This month we are featuring D1445 Amore a set of 13 stamps.  I had a hard time deciding what I was going to do when I picked up this set.  There are some great stamps, but I just wasn't feeling the pull of Valentine's.... I'm right in the middle of the mad Christmas stamping rush!

So instead of creating a "Valentine," I decided to just make a simple "I love you" card and I had so much fun!  I loved how it turned out.  I especially loved adding some sparkles from the Blue and Green Assortment (Z1327 $2.95).


Supplies Used
Magnifique Paper Pack
Lagoon and Pacifica Ink
Blue and Green Sparkles

Next up is Shannon!  Hop on over to her blog to see what she came up with....

Wednesday, November 10, 2010

Race for the Cure - Walking for Debbie

On Sunday I walked the Race for the Cure 5k in memory of my good friend Debbie Hall.  I had been wanting to do something like that for a long time.  When I found out that Ali Vincent was the captain of Team Designer Whey, I knew I had found what I wanted to do. 

Dawn and Ali Vincent
 I loved watching Ali win Biggest Loser.  There's just something about her that I could relate to.  I've read her book and listened to many of her interviews and she's so enthusiastic and motivational.  I was excited to meet her in person.

Candace, Ali and Dawn

Barbie, Dawn and Jacqueline
 One of the best parts of the walk was the fact that so many of my scrapping buddies joined me!  I have another picture with Patty and Tammy in it, but I can't find it.  I'll have to add it later.  (I'm typing this in my hotel room in Catalina) Barbie, Jacqueline, Patty, Tammy and Candace did the walk with me.  Jennifer, Bethany and Ivan had planned to join us, but poor Jennifer ended up in the hospital (gallbladder surgery).  I guess that's a pretty good reason to skip the walk!

 One of the best parts of the walk was the part where we got to walk on 163.  I've always loved that freeway!  This is a shot looking down on the runners leading the pack.


And here's a picture of us getting ready to walk under the bridge.


It was a great experience and Designer Whey was so generous and welcoming!!  They sent us emails with training tips leading up to the race, gave us a ton of free products (watch for my review and recipe using the Blueberry powder!!  Yummy!!) Ali was very personable.  She gave hugs, chatted with us and signed a ton of autographs.

And now I know... I can do a 5k.  Well, I know I can walk a 5k.  I guess I still have to work on that running part if I'm going to do my triathlon next year.

Tuesday, November 09, 2010

Scrappin Escapes Retreat

It's going to take me a couple of days and a couple of posts to catch up on all the fun I had last weekend.  I thought I would blog from the hotel room, but I think I fell asleep as soon as my head hit the pillow.  I spent the weekend at the Scrappin Escapes Retreat at the Kona Kai in San Diego. It was absolutely amazing!  I've held some small retreats for my customers and I've gone to many conventions but this was something I had never experienced.  Check out what it looks like to have 1400 feet of scrapbooking tables!!  (140 women x 10 foot table.  There was one row of tables behind me when I took this picture.)


You can get a sneak peek of some of the things I completed.  The Mistletoe WOTG layouts and cards are on the table. 


Here's a picture of Barbara and Gail looking out on the Marina.  As you can see, it was a gorgeous weekend in San Diego!!


Ooops, I forgot to take a picture when this table looked all nice and fancy.  I brought a yummy dinner (Chicken Salad Croissants, Grapes, Chips and Lemon Cake) for Gail's birthday and it ended up being a great idea!  We were able to save a ton of money by eating leftovers for lunch and we had tons of snacks for the whole weekend.

We had so much fun that we're already signed up to do it again next year.  Who can pass up an opportunity to hang out with your girlfriends, laugh until you cry and be in a room with 139 other crazy people that love scrapbooking as much or more than you do?

Stay tuned for more updates!  I have pictures of what I completed at the retreat and a little Race for the Cure update coming soon.


Thursday, November 04, 2010

My Thanksgiving Project

I am really excited to share a fun project I'm doing for Thanksgiving this year.  Below is an excerpt from my customer newsletter that explains a little bit about what I am doing.  If you would like to participate.  Please leave me a comment and I'll send you info on where you can send your cards.

******
Military Thank You


I have been blessed to be part of a family with a rich military tradition and I am truly grateful for all those who serve to protect the freedoms that we have.

Periodically I participate in projects that send cards to those who are deployed.
This year I would like to share the opportunity with you.

I am "adopting" my cousin's unit in Korea. His Korean assignment is "unaccompanied." Meaning that while he is not in Iraq or Afghanistan, his family is still not allowed to accompany him...so he and his unit live in Korea, while their spouses live in the USA.

At my November workshop I will have a couple of cards for everyone to sign, if you would like. In addition I will be accepting donations of cards that we can send to the unit. We will send Christmas, birthday, anniversary and thinking of you cards. This will allow the unit to select cards to personalize and send back home to their family.
As a military "brat," I can tell you, there is nothing more exciting than to see your Daddy's handwriting on an envelope or card!

I hope you will help me celebrate Thanksgiving this year, by taking a few minutes to thank our military and help a unit that is Close To My Heart.

****
I will be accepting card donations until November 15th.  At that point I will put the cards in clear envelopes, sort, organize and mail the package to my cousin so that it will get there in time for them to distribute the cards and mail them back home with their personal messages.  Not only do they need Christmas cards to send home, but many have birthdays and anniversaries too.  So look through your card stash and pick a few to pass on.  I'm sure the unit and their loved ones will appreciate it!

Sunday, October 31, 2010

November SOTM Blog Hop!

Welcome to the November Stamp of the Month Blog Hop!  If you came here from Angela Tutton's blog, you're on the right path.  This month we are featuring D1444 A Little Thanks (Set of 16). 

I love this set.  It has so many sayings that are perfect for cards and I love the little shapes around some of them... AND.. I think EVERYONE needs a great thank you set.  We all need to spread a little gratitude around. :-) 


I've seen a couple of renditions of this cute little pumpkin treat bag/box around the blogosphere and I just loved it so I created my own rendition. 


Edited to add:  I found the link to the original pumpkin basket with the tutorial that I saw. 
Thank you for the inspiration Debbie!

Supplies Used:
  • Scallop Circle - cricut
  • Leaves - D1371 Many Thanks
  • Paper - Autumn Terracotta, Colonial White, Chocolate
  • Inks - Olive, Barn Red and Chocolate
  • I embossed the pumpkin on the Big Shot

I filled these bags with M&M's and planned to use them for Halloween, but that never happened so I decided to see if I could use them for the Blog Hop... I started out with the folded flower and the little saying and it just needed something....as soon as I added the leaf I had laying on the table... I absolutely loved it!  So cute.  It looks like a sunflower.  I'm sure this idea could be used year round with different colors of M&M's!!


Supplies Used:
D1371 Many Thanks
Inks:  Olive and Barn Red
Paper: Colonial White and Scraps from the Grace Paper Pack

I hope you've enjoyed my creations! Now it's time to hop on over to Brae Montgomery's Blog to see what she has created.

Saturday, October 30, 2010

Halloween Costumes

Ok, so I can finally show you what I've been up to the last couple of weeks....  Our department's group costume was... a 6 pack of diet coke so we have been creating Coca-Cola Costumes!  They turned out so cute!  I drew the logos on grey sheets and then we just had to paint the logos and then sew the sheets into tube dresses.  It just took me a bit longer because I had to do three of the costumes (two people were out of town on a business trip), but really, they were pretty simple.


We even decorated our office to match (Thank you Melissa for the decorations!)


...and of course we gave out Coke and Diet Coke to all of our visitors.


My Boss asked me to make up some award certificates for the costume contest.  I couldn't just do plain and boring....


And then I had to stamp the goodie bags of course.....


And that is what has kept me busy the last couple of weeks...whew...it was a whirlwind...but it was fun!


Wednesday, October 20, 2010

Chaos and Costumes

Whew, it's been a whirlwhind around here!!  Every day I go to work, go home, walk the dog and then head to my stamp room where I'm busily cutting paper, stamping images, designing projects, using the cricut, packing kits... I'm thinking that maybe I'll be brave and take a picture of the chaos tonight.

On top of that I've been helping dream, create and design the halloween costumes for our department.  I'm hoping to finish up my prototype tonight and prep everyone else's so they can "do their homework" over the weekend.  I'd love to tell you what we're going to be, but... I can't.  We don't want the other departments to know what we're up to.  I will tell you something though... one of our "props" is music....hmmm.... (Feel free to email me and I'll tell you what we're going to be...unless you work at GCCCD or are good friends with someone who works at GCCCD...in which case I cannot trust you because you might be a spy!)

Friday, October 08, 2010

Halloween Treats and Tutorial Link Party

Ok, I have to make this quick... I'm on my lunch...   I'm participating in a link party on Tresa's blog.  Today's theme is tutorials.  Read her post and then start enjoying all the fun tutorials that are posted.

Check out the cupcakes that my upline (Bren Yule) made for our unit meeting!  Aren't they just ghoulish?  I'm whipping up a batch tonight for tomorrow's crop/workshop.  Hope to see you there!!


Thank you to everyone who has told me how much they enjoyed the tutorials I did recently.  I'm working out the bugs and almost ready to record a few more...AND...heads up to my long distance customers.  I'll be creating some great videos of some of my projects and kits I'm doing for the Santa's Workshops!!  So stay tuned.  You too, can join the fun!

Tuesday, October 05, 2010

Halloween Treat Bags


Ok folks this is just the beginning of paper bag fun!!! I bought a whole case of these cute little bags and I have oodles and oodles of ideas swimming around in my head! I can't wait to share them with you. I'm sure a few of the projects at our Santa's Workshop will feature them!

Tips and Techniques
Stamp up a hole page of these cute little monsters from the Party Animal set. Put the stamped images (I like to cut them into squares so I'm working with one image at a time), a pair of micro tip scissors and colored pencils in a zip-top bag. Clip the bag to a clipboard and you're ready to go. Grab the little kit and color while you're watching tv, during your lunch at work or while you're waiting for kids at soccer practice. Before you know it you'll have a whole little stash of these monsters ready to go.

I put together about 20 bags in less than a half hour. I cut the tags on my cricut, sponged the edges, added a spider web and a scrap piece of patterned paper and boom they were done!!

I'm thinking a little box of these goodies might be headed to the dispatch team at hubby's work.

Close To My Heart Supplies Used:
D1437 Party Animal
D1439 Spook Alley (spider web and saying)
X7129B Hooligans Paper Pack
Posted by Picasa

Thursday, September 30, 2010

September 2010 SOTM Blog Hop!

Woo Hoo!! It's blog hop day.  I can't wait to see what everyone created.

If you came here from Jill Lucas' blog, you're on the right path.

This month we are featuring D1443 Share the Magic (set of 12)  I love, love, love this stamp set.  Maybe it's because I have always loved a good coloring book and these images remind me of coloring book images. Or maybe it's because they remind me of those fun Christmas Cartoons/Specials...  All I know is I love them and they make me happy!!

I am having a blast designing projects for this year's Santa's Workshops, so I was really excited to start playing with this set.  I used a cardboard cd holder to create a fun gift.  You can slip a gift card, gift certificates, movie tickets or candy into the little pocket.  Even with all the coloring, this little gift went together super quick!!

I stamped the trees on one of the printed papers in the Mistletoe paper pack.


Supplies Used:
  • D1443 Share the Magic (October 2010 Stamp of the Month)
  • X7130B Mistletoe Level 2 Paper Pack
  • Cardboard CD holder
  • Prismacolor colored Pencils
  • Desert Sand Ink (sponged edges)
  • Black Ink

Need Colored Pencil tips?  Check out the video tutorial I did. 
Now it's time to hop on over to Misty Jackson's blog to see what she came up with.

Friday, September 24, 2010

Update and Colored Pencil Tutorial

Yep, I disappeared for a bit. Here's life in a nutshell
  1. Car was in a minor accident
  2. Car ended up being totaled. I was shocked! 
  3. When we went to clean the car out at the dealership I saw the smiley on the back and had to take a picture.  There were other cars that were obviously totaled and they didn't have smiley faces so I have no idea why ine did.  Maybe they like AAA.  Maybe they liked my car.  I decided it was a good sign that things were going to work out fine....
  4. There's a lot to do when your car gets totaled, but let me just give a little shout out to AAA.  They made the whole process smooth and easy. 
  5. Spent the next week or so looking at cars online, test driving cars at the dealer, narrowing down what I wanted....
  6. Meanwhile I told Tony, the king of craigslist and cars, what I was looking for and he found me a great deal!! One owner, always serviced at the dealer, 58,000 miles, beautiful condition... I had to buy it! So here's my new (used) car.  So far I am loving it!!
  7. Still have a bit of work to do.  Got most of the DMV stuff done.  Now I just have to get my tow hitch installed and I'm upgrading the stereo to one with an auxiliary port. You can blame the stereo on the rental car.  I loved hooking up my ipod!!
All that means that I haven't had time to even go in my stamp room, but I created this tutorial and totally forgot to post it. So, enjoy... and I hope to take some more pictures and finish up a couple of projects in the next couple of days...

Friday, September 10, 2010

Ustream, I stream...we all stream....

oo Hoo!  After hours and hours of trying to figure it all out, I finally created my first ustream broadcasts.  It's actually a pretty easy process, we just had extenuating circumstances... like... my laptop is too slow and then I couldn't figure out how to override Joshua's internal webcam so that we could use the external one I bought.

But you don't really want to know all that boring stuff.  Here are the two videos I created. 

If you're coming to the Hooligans workshop tomorrow, please watch the first video.  It gives you some tips and tricks you can use.

(Ok, so I just watched the video... little did I know that I hit the cord to the camera, moved it... and you get to see the top of my head a couple of times....  Dang, I hadn't blow dried my hair yet so I look even more bald. LOL.  Oh well.... Hope you love me anyway....)

What else would you like me to make a video of?


Tuesday, August 31, 2010

September Stamp of the Month Blog Hop

Welcome to the September 2010 Stamp of the Month Blog Hop.  If you came here from Michelle Loncar's blog, you're on the right path! This month we are featuring D1442 Thriller (Set of 9). 

Ok, true confessions here...Many, many, many are sooo excited about this set.  Me?  Not so much.  Good thing I "have" to use the stamp of the months in order to participate in this hop because I found myself starting to like this set, the more I played with it.  That vampire guy is kind of cute.  I love the sayings!!!  And I love the little heart, crown and fleur de lis.... and the skulls....well, it's hard to find them too scary or creepy when you see their heart eye patch. LOL...


Stamping Tips:
  • Sponge Sunny Yellow ink on your cardstock before you stamp the image in black
  • Use colored pencils to add color to pumpkin and white on vampire
  • Tear paper around saying to add a more creepy look...then sponge with black ink 

Stamping Tips:
Sponge edges around skull so that the skull stands out more

Supply List:
  • Black Ink
  • Colored Pencils
  • Sunny Yellow and Black Stamp Pads
  • X7129B Hooligans Level 2 Paper Pack
  • D1442 Thriller
Now it's time to hop on over to see what Jody Burger created....I hope it's not too scary.....

Monday, August 30, 2010

Bike the Bay - I did it!!!!

Woo Hoo!!!  So two years ago I did a little bike ride with my friends, called Bike the Bay.  The cool part of the ride was that we got to ride over the Coronado Bridge.  A bridge that is closed to pedestrians and cyclists.  I was not ready for the ride and I wasn't feeling well when we started.  I hit one of my lowest points ever on a bicycle.  I felt defeated and frustrated and slow and....  Here's my blog entry after that ride.

Every time I see the bridge, I am reminded of that day and I feel like I have some unfinished business. 

So this year I decided it was time to try it again. I'm lighter.  I'm stronger.  I know how to ride better.  Would it be enough to make it over the bridge without stoppin.... Oh yeah baby!!!!  It is!!!!!!!!

Candace is still nursing her fractured elbow so Su and I were on our own...


We have our own paparazzi (Josh) so we have some fun pictures.  This is the beginning of the ride.  I have no idea what Su is looking at. LOL


The let us go in small heats...so here's our little group heading out..


This time I approached the ride much differently.  Since I knew I got all excited at the beginning last time... this time I took my time.  We weren't in one of the very first heats.  We were in heat 8.  I didn't even attempt to follow anyone else's pace.  I just set my own warm-up pace and enjoyed the ride...  I was feeling great when we got to the bridge.  I downshifted and went right up the ramp!!!  As soon as I made it up the ramp, I knew I would make it the rest of the way.  It's still a decent climb for me, but I just kept pedaling.  I looked at the view and truly enjoyed where I was and what I was doing. And... I was actually passing people.  Trust me, many others were also passing me. LOL!! 

As I was climbing, I started to notice a couple of girls in pink tops way ahead of me.  Over time I could tell I was gaining on them.  When it started to get harder, I just kind of watched them and kept pedaling towards them.  I wasn't really trying to catch them.  It just gave me something to focus on and follow... Eventually I caught up to one of them and she was really struggling, but we were really close to the top, so I started chatting with her and encouraging her.  When we got to the top we celebrated and she said "I don't think I would've made it without you."  Ahhh...that totally made my day!!

Here's a picture I took from the top of the hill.  Not the greatest picture, but when you stop to think that
  1. I could still breathe.
  2. I could pull out my camera.
  3. And I could take a picture...
This little picture takes on a whole new meaning!  (At least it does for me!)


A few miles from the end we met up with Sue!!  Yes, it was Su, Sue and Me.  We were excited to be able to all finish together!  It was a great day and a great ride and now??? Now I can look at that bridge and feel pride in my accomplishment. 


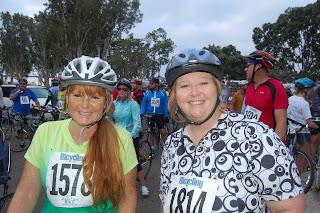
Here's Su and I after the ride...with that Beautiful Bridge behind us.  Unfortunately you can't see the part we climbed, but you can see the nice little descent we got to enjoy. :-)


Sunday, August 29, 2010

Simply Irresistible

I made this video in May and never finished it.  Ooops. The good news is that I actually did the whole thing by myself so hopefully I'll be quicker about filming, editing and posting videos now.  I need to do another one quick...before I forget how to do it. LOL.  Josh is patient...but I'm not sure how many more times he'll answer my 10,000 questions.

Friday, August 27, 2010

Autumn/Winter 2010 Idea Book Blog Hop!

Welcome to our Close to my Heart New Product Blog Hop! Over 40 Fabulous Close to my Heart Consultants are celebrating the upcoming release of the Autumn/Winter 2010 Idea Book by giving you a Sneak Peak of some of the great products available in the new Idea Book starting September 1st!


If you have come here from Karen Norman's  you are on the right path!

While we have had the Workshops on the Go for a whole year now... this is the first time they have been pictured in the catalog!!  Soooo excited.  Now you can read all about the kits and see what's included in your idea book!

Here are a few items I made with the leftover pieces from the Olivia Workshop on the Go. (first I created the featured layout, an alternate layout and then I used what was left to create more fun projects.)


Now "Hop" on over to Lori Blehm's Blog to see her work! Be sure to visit all the Consultants at their Blogs to get some fun crafting ideas and see the great new Paper Packs and My Acrylix Stamp Sets!

The Autumn/Winter 2010 Idea Book
Goes Live on September 1st! 

Wednesday, August 25, 2010

My Creations CD Holder Tutorial

I don't know who the original genious is that came up with this idea, but I heard about it from Bren Yule and immediately loved it!!!

Basically you create a pocket, by glueing three sides of the internal pages and then put a cd in the pocket!  What a great idea.  It's a perfect way to have a little memento from a trip or a special occasion and a back-up of photos from your computer too?

Or... Do you create a year in review cd/dvd?  What a fun way to store your annual dvd/cd?

The ideas are endless.  Please be sure to leave me a comment if you use this tutorial to create one of your own.  I'd love to share your creation and link back to you!

Ok, so let's get started!


You start with a 6x6 My Creations Memory Showcase

I covered the pages with paper from the Passages Level 2 Paper Pack


Create a cut-out so that you can see where the cd is.

I started by tracing the Circle Template 2 from the pattern DVD for the Wishes book.  You could look around your house or stamp table for something round that is similar in size.


I wanted to make sure that my cut-outs lined up perfectly, so I cut through both of the inside pages at the same time...which left me with some jagged edges.  You could avoid this by cutting through one page at a time or by using an exacto knife.  The scissors bite into the pages because of the odd angle.  You'll understand what I'm saying as soon as you try to start cutting. ;-)

Thankfully I had the awesome finishing files handy so I just used them to finish off the edges and sand away the rough edges.


Now that you have your opening cut, it's time to glue the pages together.  You'll need a strong adhesive.  Please note you need to raise the tape up a bit higher on the bottom or the cd will fall to the bottom of the pocket and you won't be able to see it in the cutout. 

I used a wider than usual adhesive tape on this one so my pocket ended up being really snug.  Learn from me and use something a little more narrow!


Now it's time for the fun part!!  You can embellish with a few photos that are included on the cd.  Add quotes or sayings...whatever your little heart desires.  On this one I decorated it with pictures from our beautiful Sedona bike ride and then put a cd with the rest of the pictures in the pocket.  It's a fun memento for someone that went with me on that trip...hmmm.... I wonder who's getting some happy mail.  (assuming I finally go to the post office and mail it!)

Tuesday, August 17, 2010

Salads for Crops

I'm in the middle of big project designs, but nothing is finished so no photos... What is a girl to do?  Why not share some of my favorite salads that have appeared at our monthly crops?  My customers not only create amazing scrapbook pages and cards, but they also "create" in the kitchen.. Yummy!!!

Please forgive me if I mess up any of the recipes.  This is what I remember.  Feel free to correct me in the comments.

Jessica's Fruit Salad
Fruit cocktail
Cool Whip
A couple of tablespoons of dry pudding mix

I fell in love with Jessica's salad and have changed and adapted it a million ways.  I've used vanilla and banana pudding mixes.  I've also created it with fresh fruit.  I've added chopped bananas.  And now that I'm writing this I'm wondering if it would be good with lemon pudding...hmmm...  I've also used sugar free pudding and fat free cool whip.  Turns out great everytime.  Easy Peasy and yummy!

Patty's Creations
Ok, Patty is the salad queen.  She puts together the most amazing ingredients and it always tastes good! She has brought us oriental salads, chicken salads, green salads..... One of my favorite ideas that she shared is....
Chop up your cucumber, bell pepper, celery, carrots, etc.  and put it in a dish with your dressing.  Then just add to your salad each day.  Yummy!  No need to bring an extra container for dressing.  It's already mixed in. 

Crop Stop Salad
Years ago I went to a Crop Stop Crop and the hostess made a yummy salad with ...
Bowtie Pasta
Chopped Chicken
Dried cranberries
Vidalia Onion dressing

To die for!!!!

Barbie's Creations
And then there's Barbie... Oh my... Barbie made us THE most delicious chicken salad on Saturday.  I never did hear what she put in it, but this is generally how the conversation goes every single month:

Me:  Barbie, your __________ is delicious
Barbie: Oh, it's just stuff I had on hand that I threw together.

There never seems to be a "recipe,"  She's just one of those amazing cooks that knows what to put together.  Maybe someday we can coax her to share a couple of recipes.  She also makes incredible potato soup.  Yummmmm

I've only highlighted a few fav's here.  So don't be hurt if I didn't mention you. Maybe I'm saving it for a future issue of foods Dawn loves at crops. LOL.

So tell me?  What is your favorite summer salad?  Let's have a virtual crop with a Salad Potluck.  What are you bringing?
Monday, August 16, 2010

Triple Play - National Stamping Month

Celebrate your love of stamping by using stamps to embellish the three mini albums in our exclusive National Stamping Month kit, Triple Play. With inks, stamps,albums, and pre-cut accents for stamping,you’ll complete all three albums in a jiffy. Since each album has its own color scheme, all three are unique and ready for many different kinds of photos. Make one for yourself and two to give away—if you can bear to part with them!


In honor of National Stamping Month, you can get huge discounts on the Triple Play kit when you purchase My Acrylix® stamps from your wish list, or get it free when you host a qualifying Gathering or become a Close To My Heart Consultant.

Here are five ways to get this outstanding mini album kit: (Note: We’ve saved the best for last, so be sure to read all five!)

1. Buy the Triple Play kit for $29.95 US.

2. Purchase $25 in My Acrylix® stamps and get the Triple Play kit for just $15.

3. Spend $40 on My Acrylix stamps and get Triple Play for only $5!

4. Host a Gathering with sales of $300 or more and get Triple Play FREE!

5. Join Close To My Heart as a Consultant and get the kit FREE!

National Stamping Month is always fun, but this year you’ll get three times the excitement with Triple Play!

*Qualifying stamps set purchases exclude Stamp of the Month sets, K-size custom stamps, and Workshops on the Go™ stamp sets. Tax and shipping/handling may apply. Offer valid for customers and hostesses August 15–September 30, 2010. Offer valid for new Consultant enrollees September 1–30, 2010. Limit one discount-priced Triple Play kit per order per customer. Offer valid while supplies last.