Next up on the hop is Vicki - head on over to her blog to see what she has created..
Whew this has been a long six months. My auto-ship for catalogs/stamp of the month sets, got messed up and I have been scrambling to get the stamp of the month stamp sets in time to meet my commitment to the blog hop each month... and this month I completely forgot to order it. Sheesh!!!
Good news is I have already received the next six months of stamp sets and I'm all set to get back on track.
Thank you for your understanding and I hope you have fun and get a ton of inspiration on the blog hop.

Saturday, December 31, 2011
Friday, December 16, 2011
Christmas Cards
Have you finished your cards yet? Need a couple to add to gifts? Well here are a couple of quick and easy ones....
Way back in August, when I was playing the the Elemental Paper, I set aside all of the Cranberry/Olive sheets so that I could use them at Christmas. I love it when a paper pack is so versatile that you can use it for a variety of projects!
One of the things that makes these cards so quick and easy is... I cut the tree and the ornament with the Art Philosophy Cricut Cartridge!! I put a sheet of paper in my cricut, selected the image and auto-fill and let it cut away while I cut the layers for the cards.


Tuesday, December 13, 2011
Posting Issues - Christmas Fun
Well, I planned a bunch of posts and scheduled them too...sadly something happened and they never got to you. (haha, the holidays must be invading my brain and incorporating sad rhyming in my writing)
I figured the problem out a while ago, but for some reason I just didn't feel like fixing it. I guess I was irritated, annoyed or just plain overwhelmed with life. Maybe I just needed a break?
Well folks, my "break" is over and it's time to get this show on the road and start posting all the cool things I have been creating. I'm sure many of you need some last minute inspiration, right?
First up is a little box I made using the Art Philosophy Cricut Cartridge. I used plain white cardstock and the stamp set from the Believe Workshop on the Go to add my own pattern to the box. This is a very economical way to decorate your boxes! And the best part? I can switch up the colors and use the very same design for any party all year long!
I also used the B1390 Countdown for the little circle on the front. Another fun set that can be used all year long.
Why not...

I'm always looking for fun container to "alter" and I picked this one up at Smart N Final. The "trick" to this is, you have to create a angled pattern to wrap around the container. Everyone who attended my Santa's workshop had the opportunity to copy my pattern so they could use this idea again.
Love the little tag on the top! It's from...you guessed it... the Art Philosophy Cricut Cartridge. It has a little tree cutout so I placed it on Topiary paper. Fun and Easy!

And every other year or so I have to put a new spin on Snowman Soup. This year I found these cool truffle boxes. They are clear so you can see the contents inside. My upline, Bren Yule, saw me designing my project...I had the card cut...the layers done...and I was working on the cocoa cup and she said.. "I have the perfect idea for you....Put the All Decked Out Snowman head in the cup." It was the finishing touch I needed!!!! Plus I was able to show my customers how to use a mask when they stamped their cup and snowman.

Well I hope you have gotten a little inspiration. I have a few more photos to post...and a brand new camera (that was ANOTHER reason I was absent for a while...my camera bit the dust!). Anyway...my new camera takes amazing pictures!
I figured the problem out a while ago, but for some reason I just didn't feel like fixing it. I guess I was irritated, annoyed or just plain overwhelmed with life. Maybe I just needed a break?
Well folks, my "break" is over and it's time to get this show on the road and start posting all the cool things I have been creating. I'm sure many of you need some last minute inspiration, right?
First up is a little box I made using the Art Philosophy Cricut Cartridge. I used plain white cardstock and the stamp set from the Believe Workshop on the Go to add my own pattern to the box. This is a very economical way to decorate your boxes! And the best part? I can switch up the colors and use the very same design for any party all year long!
I also used the B1390 Countdown for the little circle on the front. Another fun set that can be used all year long.
Why not...
- Create a scavenger hunt birthday and number little gifts or clues along the way.
- Create birthday cupcake toppers with the age (1, 2, 3, 50, 60, 90!)
- You can use the numbers on a birthday card too.

I'm always looking for fun container to "alter" and I picked this one up at Smart N Final. The "trick" to this is, you have to create a angled pattern to wrap around the container. Everyone who attended my Santa's workshop had the opportunity to copy my pattern so they could use this idea again.
Love the little tag on the top! It's from...you guessed it... the Art Philosophy Cricut Cartridge. It has a little tree cutout so I placed it on Topiary paper. Fun and Easy!

And every other year or so I have to put a new spin on Snowman Soup. This year I found these cool truffle boxes. They are clear so you can see the contents inside. My upline, Bren Yule, saw me designing my project...I had the card cut...the layers done...and I was working on the cocoa cup and she said.. "I have the perfect idea for you....Put the All Decked Out Snowman head in the cup." It was the finishing touch I needed!!!! Plus I was able to show my customers how to use a mask when they stamped their cup and snowman.

Well I hope you have gotten a little inspiration. I have a few more photos to post...and a brand new camera (that was ANOTHER reason I was absent for a while...my camera bit the dust!). Anyway...my new camera takes amazing pictures!
Wednesday, November 30, 2011
Mad About You - December SOTM Blog Hop
Welcome to the December Stamp of the Month Blog Hop! If you came here from Susan's blog, you're right on track and I'm the next stop.

I have been working on an album for a wedding present and this stamp set worked perfectly. Here's a couple little embellishments I made for this page.

Now it's time to hop on over to Haley's blog to see what she came up with. She always does amazing work, so I'm sure it will be something terrific.
Monday, October 31, 2011
CTMH Cherish the Day - SOTM Blog Hop
Welcome to the SOTM blog hop. This month we are featuring a stamp set with 44 stamps called Cherish the Day.
If you came here from Jen Patrick's blog you're on the right track...just follow the link at the end of my blog to see more fun examples using the Cherish the Day stamp set.

(Artwork to come....was out of town and just got my stamp set... And then I had to make my Halloween costume. Oops...I'm working hard to get it posted. Sorry for the delay!!)
Next up, let's see what Shannon came up with...
Friday, October 28, 2011
CTMH Paper Hearts Team
One of the best things about being a Close To My Heart consultant, is the relationships you build with your customers, fellow consultants and team members! Now that I've been a consultant for over 16 years, I have built some wonderful friendships with consultants from all over North America and every once in a while we get to gather together in the same room......
On Saturday, October 15th, Bren Yule and Close To My Heart hosted an event called Leadershare. We were treated to presentations from CTMH corporate staff and several local consultants, including yours truly. You may have seen my silly video I posted here.
My upline, Bren Yule, was the local hostess for the event and you could see her little touches all over the room. She truly made the day special. She even set up a fun little photo booth area. Of course we had to take a few pictures.
Sadly, my team member Lauren isn't in any of the pictures. She was the one that reminded us to go do it...and then she had to leave before we were able to. We may have to have a make-up picture day!

Patti, Dawn, Patti and Patty
How funny is that!!! I actually have 3 darling Patty's (Patti's) on my team!!!
You know...there's still a couple of days left on the consultant special!! I have two more Paper Hearts team shirts that I'd love to give away. And if your name is Patty or Patti, I just know this is the team you're meant to join. If your name isn't Patty or Patti, we have room for you too!! At least the whole room won't turn around when I say your name.


My buddy (partner in crime) Candace posed with me too. You gotta watch out when the two of us are together. We are nothing but trouble!

Thursday, October 27, 2011
Digi Scrapping the Studio J way
I know the words "digi scrapping" just struck fear into the hearts of more than a few of my customers. Have no fear!!! Just take a moment to read my series of posts and see what I have to share. It just might be easier than you think. (I was surprised at just how easy!!!!)
Ok - so this is post number 1 in my Studio J series. I'm going to give you little bits and pieces to slowly introduce you to all the amazing things that Close To My Heart's Studio J can do. If you're a "techy" girl (or guy!) I'm sure you'll take one look and fall in love...the rest of you... I'm sure you'll love it too, but we'll take our time and learn and explore together.
Here are a few reasons why I think you should try Studio J
Want to see a couple of samples? Here are the first two layouts I made with Studio J.
Ready to take a look for yourself? Visit my website and see what you think of Studio J
Ok - so this is post number 1 in my Studio J series. I'm going to give you little bits and pieces to slowly introduce you to all the amazing things that Close To My Heart's Studio J can do. If you're a "techy" girl (or guy!) I'm sure you'll take one look and fall in love...the rest of you... I'm sure you'll love it too, but we'll take our time and learn and explore together.
Here are a few reasons why I think you should try Studio J
- You do not have to load any software on your computer!! Just visit our Studio J website.
- The software is absolutely FREE to use and you NEVER have to update!!
- You never have to buy packages of digital images or paper. Every pattern and every sticker is included. (There are additional items available to members...but we'll talk about that later.)
- Retired paper pack prints are still available on Studio J.
- Patterns from our fabulous scrapbooking programs are included so you don't have to come up with your own design. Just click a button and then customize to your hearts content.
- Just wait until you see what we can do with the jpg images of your pages (jpg's are available for purchase but they are FREE for members!)
- On vacation, want to scrapbook? No need to bring any materials with you! Just a laptop and an internet connection.
- Quick and easy way to catch up on your scrapbooking.
- You can change the color of any patterned paper to match your pictures or theme!!
- Prefer to scrap the old fashioned way? Design your page on the computer and then copy it with real paper and embellishments. (Great way to see how patterns look together, etc.)
Want to see a couple of samples? Here are the first two layouts I made with Studio J.
Ready to take a look for yourself? Visit my website and see what you think of Studio J
Tuesday, October 25, 2011
Traverse City and Flushing - The Food we ate....
Half the fun of traveling is trying out the local food! I was more than a little bummed when I tried to find little mom and pop burger joints when I was driving from Detroit to Traverse City. I saw plenty of McDonalds, Taco Bell, Wendy's, Arbys (it seems like Arby's is BIG in Michigan) and Subway. I'm sure there might be other choices, but you probably have to drive a couple of miles away from the highway to find them.


Thankfully I was visiting family and friends so I was able to try a few fun places during the trip...
First stop - Flushing Michigan with Lori
Lori took me to her favorite local deli and we had a delicious philly sandwich on chipotle bread with spicy mayo. Yummy!! The staff was hometown friendly. (The Deli is in the building below along with some kind of town office.)

The Rye Bakery - Sadly the bakery is closed on Monday's and I was visiting on...you guessed it, Monday. Thankfully the coffee shop next door had one vagabond pastry. I am not a desert/pastry girl but oh my goodness, it was absolutely delicious. So delicious that I made a special trip back through Flushing on my way home so I could pick up some to share. I wish I had more time, the bakery was full of wonderful delights!

Next Stop - Frankenmuth
My hubby's family is German so Lori and I went to Frankenmuth to pick up some treats. We found the most delicious Cinnamon bread at the Bavarian Inn Bakery (downstairs). It was topped with a cinnamon type icing.

Traverse City
We had to return to two of our favorites in Traverse City - Pangea and Scalawags Whitefish & Chips. The pizza at Pangea is delicious. They have a wide variety of choices, but we love the pizza and can't seem to try anything else. Scalawags is a family favorite. We get the whitefish and chips and my mother inlaw always gets the perch. One of these days I might have to try the perch.
Here's a weird little tip for Pangea's... make sure you stop by the bathroom. Check out the amazing mural! The entire bathroom is covered. Rumor has it there's an eagle in the men's bathroom. I guess the menfolk aren't as weird as I am. They didn't think to take pictures. LOL

New favs -
Flap Jack Shack
We loved this place so much that we had to eat there twice. It's a cute restaurant with a retro 70's decor that is done really well! Apparently I picked the best thing on the menu because everyone loved my choice so much, that the entire family ordered the same thing on the next trip... Corned Beef Hash and Eggs. I love corned beef hash and tend to try it everywhere I go so it's a big deal when I say...this is THE best corned beef hash I have ever had!!!!! Loved it!

I think this is actually a local chain restaurant. It was a fun sports bar with tons of tv's all around the room. We thought about going at night, but saw a big crowd outside so we went back for lunch. The service was wonderful and the wings were good (I love wings and these were good, but similar to most wing places)...the thing you HAVE to try is the fresh pretzels. They were absolutely delicious!
Monday, October 24, 2011
Back from Vacation!
I find it pretty hilarious that I just taught a blogging presentation and broke every single rule I shared. Oops! In my defense, it wasn't entirely my fault. I had the best of intentions, but sometimes life happens... I was busily prepping for my presentation,creating artwork and planning for my Michigan vacation when everything kind of collapsed around me.
I broke a tooth and the dentist found another tooth with a broken filling. I spent two mornings with the dentist (and I still have to go back to get the work finished...) and then all of the sudden I was a sniffling, sneezing, eyes watering mess. I mean MESS!!!! I tried everything. Do I have a cold? Is it allergies? Is it a sinus infection? (I'm still suffering two weeks later, so if you guessed sinus infection, you win! LOL)
The last few days before I hopped on the plane are kind of a blur. Packing was hilarious! I just opened up my suitcase and started throwing things in. I ended up forgetting three things: an umbrella, phone charger for the car and my jacket. Did I mention I went to Michigan? Yeah, jacket was kind of a big thing...but hey... shopping was fun!
The good news is that I took a ton of pictures in Michigan and started work on some fun projects to share, so give me a couple of days and I'll get my little blog back on track.
Here are a few things I'm working on:
Studio J Series - (Digital Scrapbooking the Close To My Heart way!)
Hubby and I literally made my inlaws take the old family photos off their walls so we could scan them. I can't wait to show you what I'm doing with them now....
Bicycling in Michigan
Yep, we made it...Hubby thinks I was in stage one hypothermia, but we were able to sneak in a bike ride between storms.
Fly and Rent a Car - Best way to see someplace new!
The absolute best decision I made for this trip, was to fly to Detroit and drive the 4 plus hours to Traverse City!! I think I might plan every trip this way. I got to see so much more of Michigan.
So stay tuned!! Some great blog posts with gorgeous pictures, are headed your way!
Thursday, October 20, 2011
Fall Blocks
Here are the cute Fall blocks we made at the last workshop.

Supplies Used:
Dreamin Paper Pack
Art Philosophy Cricut Cartridge (letters)
My friendly woodcutter, Ivan, cut the blocks for me. Check out his blog to see the adorable wooden toys he makes!

Supplies Used:
Dreamin Paper Pack
Art Philosophy Cricut Cartridge (letters)
My friendly woodcutter, Ivan, cut the blocks for me. Check out his blog to see the adorable wooden toys he makes!
Sunday, October 16, 2011
My Blog Song...
I had the amazing opportunity to do a presentation on Blogging at Close To My Heart's San Diego Leadershare yesterday. I was so excited to talk about blogging!!! I've been saving it all up for 10 years. hahaha! There was a point when all my friends thought I was a little weird because I "blogged." I can't lie. I kind of love the fact that now they are asking me for tips so they can start their own blogs.
I got a little crazy when I was preparing my presentation and I sent my manager, Bren Yule, the following text message..
"You know what would be really cute...a blog song a la the mom song...listing all the things you could blog about."
Sometimes I should just stop and think before I say (write) things like that!!
So here are my suggestions before you watch the video
- I know I can't sing.
- If you focus on the words written below me, it kind of keeps you from concentrating on how dorky I look.
- I promise, it's the last time I'll sing on a video.
- These blogging tips are geared towards CTMH consultants and not "blogging" in general so you may disagree with my suggestions and I know they go against some of the "norm" for regular blogging.
Thursday, October 06, 2011
Get a Fab FREEBIE in October!
Have you ever thought about becoming a Close To My Heart consultant? Want to join my Paper Hearts team?
Well this just might be the time!!


Sign up as a new consultant between October 1-31 and receive one New consultant Kit add-on collection of your choice FREE! Add-on collections are priced at $40 each and have a retail value of $80, making this an incredible deal!
For just a $99 enrollment fee, you'll receive a New consultant Kit packed with business essentials and new products valued at over $280, plus a FREE add-on collection to enhance your kit! Then you can choose to buy one or both of the other add-on collections for just $40 (US&CAN) each. It's an incredible deal!
*Shipping/handling and tax may apply. Offer good October 1—31, 2011. Limit of one free add-on collection per new Consultant. Available only during enrollment. Contents of the New Consultant Kit and Add-On Collections are subject to change at any time without notice.
Well this just might be the time!!
Here's a picture of the Basic Kit - $99

Become a Consultant in October and get one add-on collection FREE*!
Here's the Roxie Add-on Kit.....

Or...
Want to try Studio J? You can pick the Studio J
Add-On Kit

Or....
Were you lovin all the Elemental Samples I shared a while back?
You could pick the Elemental Add-On Pack...

I would love to have you join my Paper Hearts team
Click Here to contact me
or
Click Here to Sign-Up Now
Sign up as a new consultant between October 1-31 and receive one New consultant Kit add-on collection of your choice FREE! Add-on collections are priced at $40 each and have a retail value of $80, making this an incredible deal!
For just a $99 enrollment fee, you'll receive a New consultant Kit packed with business essentials and new products valued at over $280, plus a FREE add-on collection to enhance your kit! Then you can choose to buy one or both of the other add-on collections for just $40 (US&CAN) each. It's an incredible deal!
*Shipping/handling and tax may apply. Offer good October 1—31, 2011. Limit of one free add-on collection per new Consultant. Available only during enrollment. Contents of the New Consultant Kit and Add-On Collections are subject to change at any time without notice.
Monday, October 03, 2011
CTMH Art Philosophy - It's Border Time!
I hear ya, I hear ya... Now that you have dusted off your Cricut and have your CTMH Art Philosophy Cricut Cartridge in your hot little hands... you want to make borders!
The good news is that the borders cut beautifully and they work exactly like they are designed to work. It's just that WE want them to do more and more. LOL!
Today's video concentrates on how to use the borders using just the Cricut. We have a ton of Cricut newbies that just invested in the cartridge and the machine and they aren't quite ready to buy a Gypsy or learn how to use software. Not everyone has a laptop to take with them to crops... You get the idea.
So sit back and enjoy my video where I share a few tips about
I'd love to know if this video helped you, so please leave me comments and feel free to let me know what other videos you'd like me to make!
The good news is that the borders cut beautifully and they work exactly like they are designed to work. It's just that WE want them to do more and more. LOL!
Today's video concentrates on how to use the borders using just the Cricut. We have a ton of Cricut newbies that just invested in the cartridge and the machine and they aren't quite ready to buy a Gypsy or learn how to use software. Not everyone has a laptop to take with them to crops... You get the idea.
So sit back and enjoy my video where I share a few tips about
- how the cricut measures borders
- increasing the size and length
- adding embellishments to hide border seams
- and much more.
I'd love to know if this video helped you, so please leave me comments and feel free to let me know what other videos you'd like me to make!
Friday, September 30, 2011
CTMH Blog Hop - Holiday Magic Banner
Welcome to the CTMH Stamp of the Month (SOTM) blog hop! This month we are featuring S1110 Holiday Magic (set of 18). If you came here from Paige's Blog you're right on track!
I love it when our SOTM sets have stamps in them that can be used all year long and this stamp set definitely fits the bill!! There are only a few stamps that are exclusively Christmas...

This fun garland can be made in a variety of colors and you can re-use the idea all year long! Come back soon to see my garland...spooky style. (I have an Art Philosophy Borders video ready to post tomorrow...so I'll post the garland on Sunday or Monday)
Shh... this little elf put the garland up in a few places around the office to take pictures. It looked so cute!!! I can hardly wait to bring it back (I'll make it longer...) when it's time to decorate for the holidays!

(along the edge of our counter)

(On the door... It looked so cute in person!)
You can purchase the Holiday Magic stamp set for $17.95 during the month of October, or you can buy it for only $5 when you spend $50.
Here's a list of wonderful coordinating items that will make your holiday crafting easier. Mix and match to create your own $50 kit and then add a little "Holiday Magic" for only $5.
- X7145 Believe My Stickease Assortment - $4.95
- G1030 Workshops on the Go Believe Kit (I think this is a must have!! Great deal!) $29.95
- B1390 Countdown $9.95- (make a cute countdown calendar and much more.)
- X254 Cards and Envelopes (50 card value pack!) $14.95
- All of the above is only $59.80 and you will be able to make a ton of projects
(hint, hint... I'll be sharing tons of ideas with these items over the next couple of months.
Buy them now and you'll be ready to copy away!)
Well let's hop on over to Angel's blog to see what fun she had with this stamp set.
Sunday, September 25, 2011
Book Card Video Tutorial
I taught this fun card at my workshop a couple of weeks ago and my
customers asked me to create a video so they can watch it again later.

I aim to please...
so here we go....

I aim to please...
so here we go....
Tuesday, September 20, 2011
National Stamping Month Tip #4
Need inspiration? Well, put down the stamps and papers and go take a walk. Yep, my tip for today is to go outside. Go for a walk, a run, a bike ride, play frisbee, chase your kids around the yard. You decide on the activity...but it must be outside! (Even an invigorating walk to the mailbox in the snow can work.)
Being outside elevates your mood and opens up the channels to creativity. Don't believe me? Try it!
Whenever I'm stuck on a project or I don't know where to start. I pull out the paper, stamps, inks and accessories that I know I want to use and I lay them on the table. I take a good look at them, put the leash on the dog and go for a walk.
Bonus Tip: This makes the kids and the pups happy too! They'll stay out of your hair for a bit while you create.
I'd love to hear what you do when you're stuck? Have you tried my suggestion?
Monday, September 19, 2011
CTMH Fall Banner Workshop
Here's the fall banner that we'll be completing at my October crops/workshops. Fee is $5 for this project and includes the rubons. (We used the Halloween portion of the package on the September projects. You will have additional rubons leftover that you can add to the banner or use on another project.) I currently have 10 kits still available at this price. Additional kits will receive a full package of rubons and the price will be $8.

It was really hard to photograph this with my limited photography skills. It is so adorable in person!!! I took the picture at an angle so you can see the dimension on the letters.

Techniques used/highlighted on this project:
- Tone on tone stamping
- Applying rubons
- Sponging/Distressing
- Art Philosophy cutting techniques
Friday, September 16, 2011
CTMH Imagine Layouts featuring Dreamin
Just look what you can do with 1 Level 2 Paper pack, 1 package of My Stickease, 6 pieces of neutral cardstock and the Imagine Book. (I actually have a few pieces left over that I'm creating cards with so stay tuned to see what else I made!)


I sponged a little ink on some of the pages, but didn't add anything else. I wanted you to see exactly how it comes out when you use the supplies listed above.
I will be featuring these layouts at my crop on October 8th. If you purchase a level 2 paper pack and 1 package of stickease, I'll share the handout with you. (Please remember, you also need the extra neutral cardstock to complete the layouts as pictured below. You are welcome to order that too!)


Thank you to fellow consultant Barbara Trommer for the inspiration and help!
Wednesday, September 14, 2011
National Stamping Month 2011 - Tip #3
Let's talk about adhesives... There are tons of adhesives on the market and my choice of adhesive changes, depending on the project I'm working on. This is not a complete list of adhesives!!!! This is just what the normal stuff I use over and over again. I'll chat about some of the specialty stuff as I use it on projects. For everyday scrapbooking and cardmaking, you should be all set if you pop this in your tool bag....
Avery or Elmers Glue Sticks (not pictured)
Yep, I'm a glue stick girl. I love them. If you want glue stick success you need to
Be patient - roll it with a brayer and hold that puppy down for a minute, especially if you're working on a dimensional item AND be generous with your glue sticks! Cover that paper!!
Bonding Memories Glue
This comes in two sizes. The wide tip is pictured below. Beyond being a wonderful adhesive, I love that this glue becomes repositionable! I use it for masks all the time. Put a little glue on and wait for it to turn from blue to clear. Once it's clear it's a repositionable adhesive! Which means, I use this wide tip one to refresh my cricut mattes! I use the narrow tip version for small items like letters and cricut cuts and I use it with glitter.
 Glue Dots
Every tool kit needs these!! You can adhere ribbon and flowers and buttons and all sorts of fun accessories.

Tape Runner
I haven't ventured into the ATG gun world....yet...I keep thinking about it.... I love that these little tape runners are small and fit in my bag. I kind of interchange the use of tape runner and glue sticks depending on my mood. Tape runner is quick and less messy.
 Other Adhesives I use
Avery or Elmers Glue Sticks (not pictured)
Yep, I'm a glue stick girl. I love them. If you want glue stick success you need to
Be patient - roll it with a brayer and hold that puppy down for a minute, especially if you're working on a dimensional item AND be generous with your glue sticks! Cover that paper!!
Bonding Memories Glue
This comes in two sizes. The wide tip is pictured below. Beyond being a wonderful adhesive, I love that this glue becomes repositionable! I use it for masks all the time. Put a little glue on and wait for it to turn from blue to clear. Once it's clear it's a repositionable adhesive! Which means, I use this wide tip one to refresh my cricut mattes! I use the narrow tip version for small items like letters and cricut cuts and I use it with glitter.

Every tool kit needs these!! You can adhere ribbon and flowers and buttons and all sorts of fun accessories.

Tape Runner
I haven't ventured into the ATG gun world....yet...I keep thinking about it.... I love that these little tape runners are small and fit in my bag. I kind of interchange the use of tape runner and glue sticks depending on my mood. Tape runner is quick and less messy.

- Modge Podge
- Hot Glue
- Xyron
Tuesday, September 13, 2011
CTMH Art Philosophy Cricut Tips #3
Here's a quick little video with more cricut tips for the CTMH Art Philosophy Cricut Cartridge.
Bonus tip for my blog readers!
Here's how I cut my shapes to make the most of my time...
Select several images at once. (Shape 1, Shape 2, Shape 3, Shape 4, Shape 5)
Set size = 1/2 inch
Cut
Repeat Last
Set size = 3/4 inch
Cut
Repeat Last
Set size = 1 inch
Cut
Then I took a sharpie and labeled each piece with the name of the shape and the size I cut it at.
Are you going to create your own? I'd love to see how your organize them or how it works for you!
Tuesday, September 06, 2011
National Stamping Month 2011 - Tip #2
Getting Organized.... It seems like I'm much more productive when I actually know where my supplies are... so here are a few of the organizing tips that work for me...
Stamps
I file by Color - Below is a picture of how the stamps are packaged.

As you can see they are already "color coded." I can tell by looking at this picture, that the "pink" set is a sentiment set and the "blue" set is a "frame, tags and borders" set. Instead of reinventing the wheel, I just go with what CTMH provides. My customers at my crop will often say "Where can I find Easter stamps?" and I say "Check yellow." It takes a little time to memorize the "code," but once you get it....you'll always know where to look!
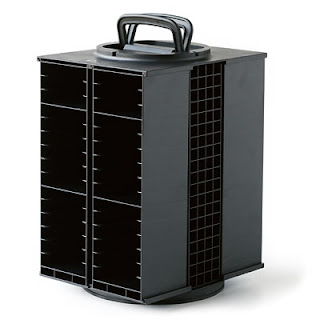
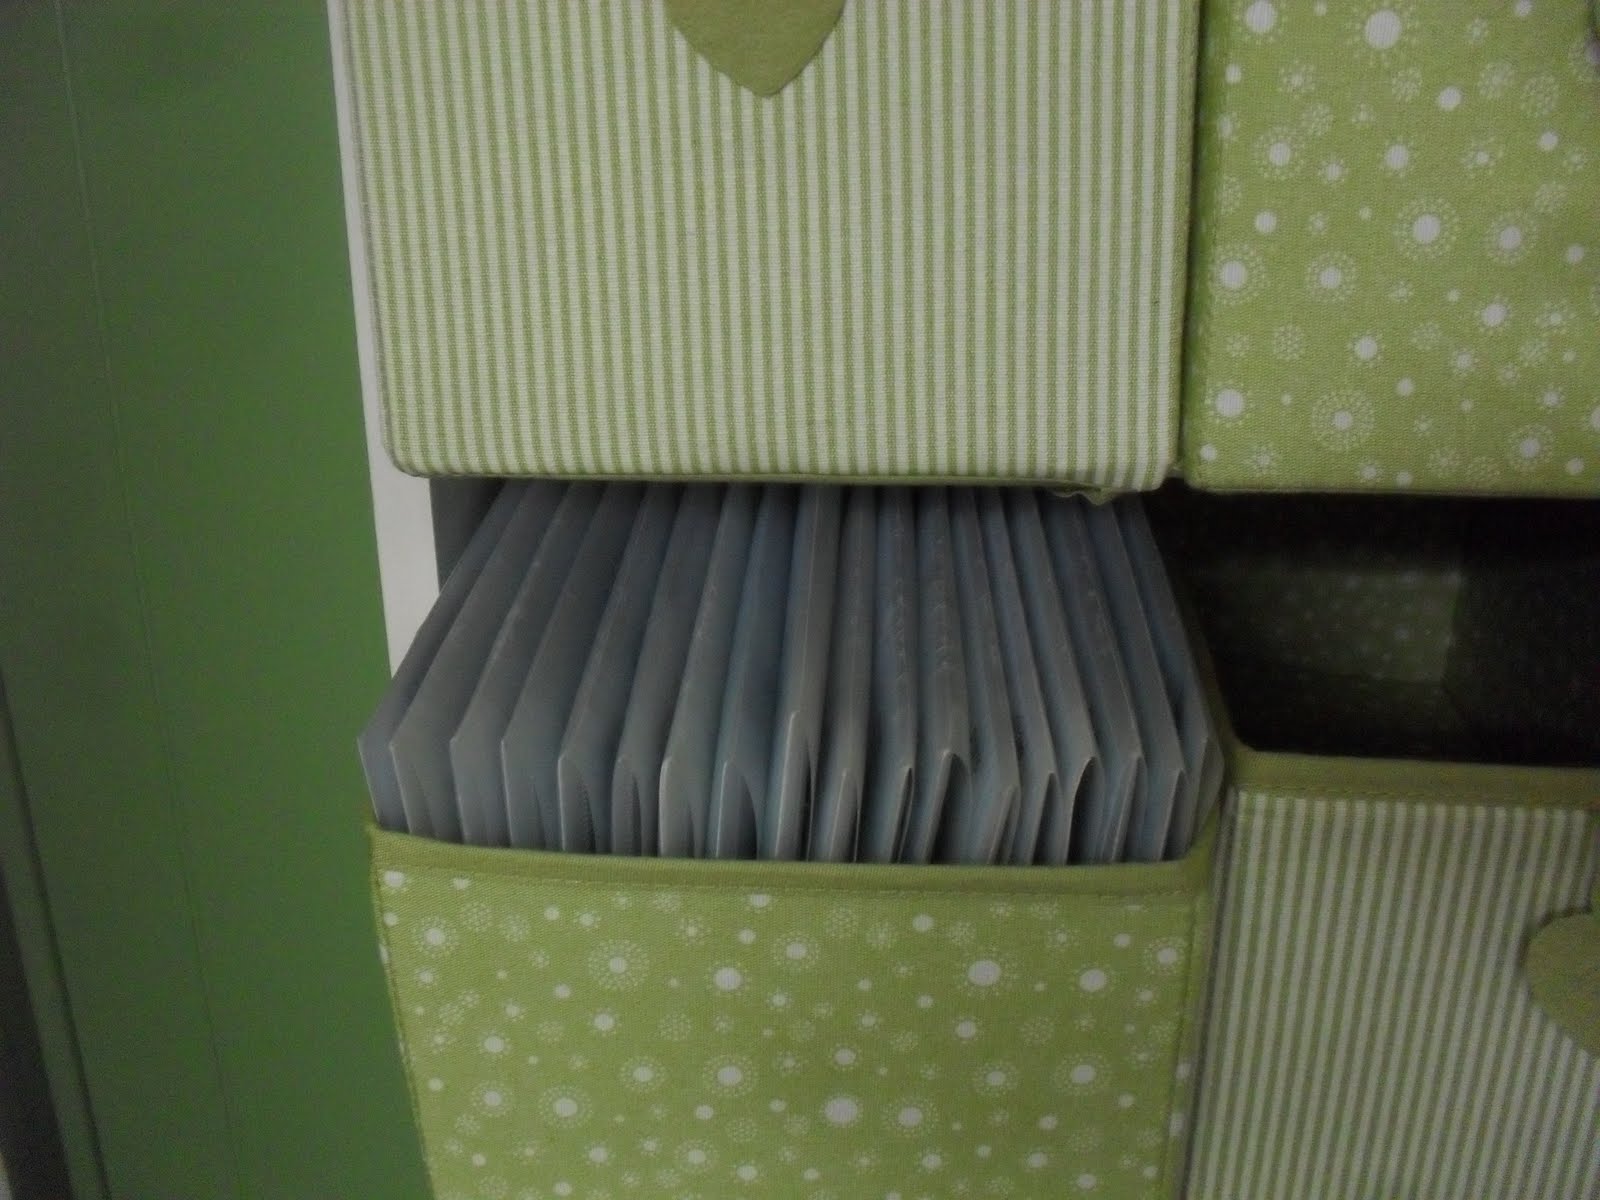
While CTMH sells an awesome stamp holder that I use when I'm on the go.... I have way too many stamps at home for that system to work for me. My stamp organization has evolved over time. Here's the latest version from Ikea!! Love, love, love these!! They hold a ton of stamps, look cute AND match my room!

I turned one of the small ones sideways so you can see the stamps inside. The package from Ikea comes with two small containers and one large.

Stamp Pads and Markers
I use the Exclusive Inks Organizer to hold all my stamp pads and markers. It's on a lazy susan base so you can spin it around to see the different colors. I haul this organizer all over the place!! I move it around my table as necessary and I slip it inside it's case to take it to all my crops. If I had to pick just ONE organizational item from CTMH that I absolutely could not live without....this would be it. Love it!

Stamps
I file by Color - Below is a picture of how the stamps are packaged.

As you can see they are already "color coded." I can tell by looking at this picture, that the "pink" set is a sentiment set and the "blue" set is a "frame, tags and borders" set. Instead of reinventing the wheel, I just go with what CTMH provides. My customers at my crop will often say "Where can I find Easter stamps?" and I say "Check yellow." It takes a little time to memorize the "code," but once you get it....you'll always know where to look!
While CTMH sells an awesome stamp holder that I use when I'm on the go.... I have way too many stamps at home for that system to work for me. My stamp organization has evolved over time. Here's the latest version from Ikea!! Love, love, love these!! They hold a ton of stamps, look cute AND match my room!

I turned one of the small ones sideways so you can see the stamps inside. The package from Ikea comes with two small containers and one large.
Stamp Pads and Markers
I use the Exclusive Inks Organizer to hold all my stamp pads and markers. It's on a lazy susan base so you can spin it around to see the different colors. I haul this organizer all over the place!! I move it around my table as necessary and I slip it inside it's case to take it to all my crops. If I had to pick just ONE organizational item from CTMH that I absolutely could not live without....this would be it. Love it!


How do you organize your stamps, stamp pads and markers?
Thursday, September 01, 2011
National Stamping Month 2011 - Tip #1
September is National Stamping Month and I'm planning to celebrate by sharing tips, techniques and ideas to help you make the most of your stamping time.
How many of you have had your husbands tell you that you have to have the right tools for the job? I know this mentality has sure helped me in my house. My husband fully supports all gadget and gizmo purchases and if they are on my wish list....I'm sure to find them on those special gift giving holidays. Of course he has a shed full of drills and saws too. LOL
Today I'm going to focus on a few of the basic tools that I think should be in every good stamper's toolbox.
 You definitely need a good paper trimmer and I've had great success with the Fiskars trimmers. I have a big CARL trimmer to prep for workshops, but my everyday, cart around in my bag trimmer is an old fashioned fiskars. I have 6 of them that I take with me to workshops and crops. (I got this picture from my CTMH website and it's so stinkin cute. I may need to upgrade one of my trimmers.)

Not all cutting can be done on a trimmer, you'll also need a pair of micro-tip scissors. Don't buy inexpensive kids scissors. You need a good sharp pair that will do intricate cuts! (Z534 $9.95)
Piercing Tool Kit - Love, love, love this little kit! It comes with a piercing tool, two sewing needles and a push pad. This is perfect for making holes for brads and sewing. I could right a whole post (hmmm...maybe I did?? Coming Soon!) about using the piercing tool to add some pizazz to your projects. (Z1114 $5.95)
 This is a bone folder and it makes all your folds crisp and clean! Once you tried it out, you won't want to work on a project with out it. (Z1204 $4.95)
 Next up is a rubber brayer! My regular customers know the great value of this little tool and now I'm going to tell you. Not only does it make incredible backgrounds (which I'm often too lazy to create - hey, I have awesome texture paper!) but I think it's real, everyday, gotta have it in my tool kit talent, is....helping to glue things down.
You know the drill, you put some glue on your paper, you attach the paper to your project and you rub it down....well grab your brayer and roll it baby! No smudges on photos, the pressure activates the tape runner and gives you a solid bond. (Z616 $12.95)


Got tools? Now you need something to put them in. My customers laugh at me because I can fit a whole lot in one of these little babies. I have several that we'll be chatting about later in the month. But for now, you need one for your tools. ;-) (Z4200 Accessories Case $12.95)
If your toolbox is missing any of these items pop on over to my website to pick them up or add it to your order for our next crop, workshop or gathering.
I hope you'll check back often this month because I'll be sharing the following tips and much, much more....
How many of you have had your husbands tell you that you have to have the right tools for the job? I know this mentality has sure helped me in my house. My husband fully supports all gadget and gizmo purchases and if they are on my wish list....I'm sure to find them on those special gift giving holidays. Of course he has a shed full of drills and saws too. LOL
Today I'm going to focus on a few of the basic tools that I think should be in every good stamper's toolbox.


Not all cutting can be done on a trimmer, you'll also need a pair of micro-tip scissors. Don't buy inexpensive kids scissors. You need a good sharp pair that will do intricate cuts! (Z534 $9.95)
Piercing Tool Kit - Love, love, love this little kit! It comes with a piercing tool, two sewing needles and a push pad. This is perfect for making holes for brads and sewing. I could right a whole post (hmmm...maybe I did?? Coming Soon!) about using the piercing tool to add some pizazz to your projects. (Z1114 $5.95)


You know the drill, you put some glue on your paper, you attach the paper to your project and you rub it down....well grab your brayer and roll it baby! No smudges on photos, the pressure activates the tape runner and gives you a solid bond. (Z616 $12.95)

Next up is our handy dandy Versamat. The mats create a great work surface. This side is the self-healing side, perfect for using a craft knife, but I use it to measure, measure, measure... Just cut a bunch of pieces for your card or layout from a sketch and don't remember which is which? Lay it on the grid and measure it. Need 9 inches of ribbon...lay it across the grid and snip it.
But wait, that's not all! Flip this baby over and it has a "cushy" side which makes it a perfect cushion for stamping. (Z1279 $14.50)
But wait, that's not all! Flip this baby over and it has a "cushy" side which makes it a perfect cushion for stamping. (Z1279 $14.50)

Got tools? Now you need something to put them in. My customers laugh at me because I can fit a whole lot in one of these little babies. I have several that we'll be chatting about later in the month. But for now, you need one for your tools. ;-) (Z4200 Accessories Case $12.95)
If your toolbox is missing any of these items pop on over to my website to pick them up or add it to your order for our next crop, workshop or gathering.
I hope you'll check back often this month because I'll be sharing the following tips and much, much more....
- Stamping Tips and Techniques
- Adhesive
- Card and Scrapbook Sketches
- Mission - Organization
- Unlock your creative side
- and even more tool time (Besides the "necessary" tools there are a whole lot of "gotta haves!"
Wednesday, August 31, 2011
CTMH Stamp of the Month Blog Hop
Welcome to the Stamp of the Month Blog Hop! If you came here from Sarita's Blog, you're on the right track. This month we are featuring "Limited Edition."

It took me about two seconds to see that there was a bicycle in this stamp set, so of course I had to use it. I had fun adding the little zip strip from the top of the Roxie paper pack that says "You're my Inspiration."

And then I decided to scrapbook some pictures from our trip to Catalina. While there are no pictures of us riding bikes on the layout, I still had to use the little bike stamp because that was the whole reason my sweet hubby took me to Catalina. He read an article about how you can ride around the island and decided it would be the perfect anniversary destination. I can't think about that trip without thinking about the thoughtfulness behind it....so I added the little bike stamps to the layout.


Now it's time to head on over to Wendy's Blog to see what she has come up with.

Subscribe to:
Posts (Atom)